

As described previously, all library users are assigned a unique barcode in the library system. This barcode is used when loaning books to library users (Note: Librarian+ customers are also able to type names instead of using barcodes.)
Many schools will either print off the barcodes and keep them in a file next to the library computer or stick these barcodes in the children’s workbooks/journals.
Read the Customer Help Guide on Printing User Barcodes.
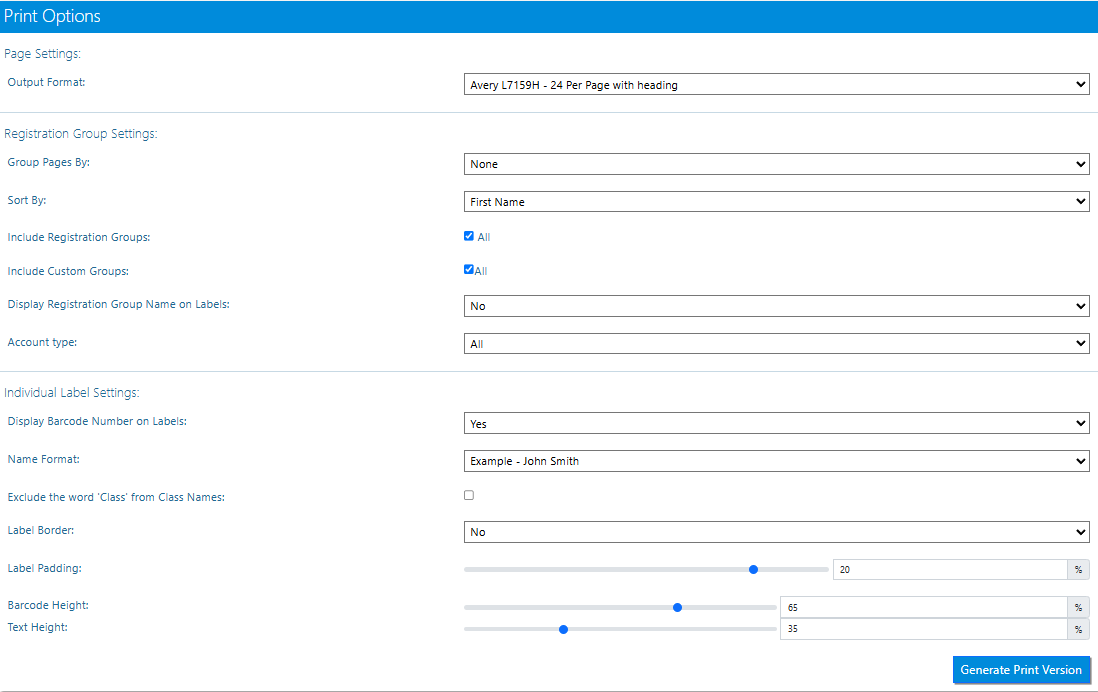
There are a number of printing options:
- Output Format – adjust the number and size of the barcodes per page
- Group Pages By – choose to group pages by registration or year groups
- Sort By – how the students are sorted
- Include Registration Groups – select which classes to print
- Display Registration Name on Labels – useful if producing stickers for student diaries, or library cards
- Account Type(s) – All, Students or Staff (includes “class” users)
- Display Barcode Number on Labels
- Name format – choose how the name is displayed
- Label Border – add a border to each label
- Label Padding – The gap between each label
- Barcode Height / Text Height – increase the size of the name on the label
Once printing preferences have been selected click Generate Print Version and print in the normal way.
Tasks
- Print the barcodes for a particular registration group only
- Print the barcodes for a particular custom group
- What happens if you untick ‘all’ on Include Registration Groups or Include Custom Groups and don’t select another option for these options?
- What happens if you group the pages by custom group?
- Increase the text height on the labels to its maximum. Why do some names look bigger than others?
- From which other locations might you be able to print barcodes? (Hint – think user!)